
3.7v Battery Low Full Indicator Circuit
In This Project 3.7v Battery Low Full Indicator Circuit, We Are Going To Make A Very Simple Battery Level Indicator. This Indicator Circuit Is For A 3.7 Volts Indicator. We Have Designed This Circuit With Few Components At Home With Easily Available Components. These Components Can Either Be Collected From An Old Circuit Or Can Be Purchased From An Electronics Shop Easily.
Components required for 3.7v battery level indicator
- Transistor – BC547 X1
- Resistor – 1K X2
- Resistor – 220 Ohms X3
- PN-Junction Diode – 1N4007 X1
- LED – 3V X2 (Red For Low Charge Indication And Green For Full Charge Indication)
- Battery – 3.7V And 3V
Step 1.
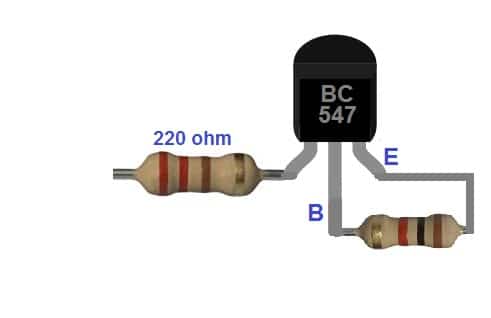
First, Connect 1K Resistor To Base And Emitter Pin Of The Transistor As Shown In The Picture Given Below.
Step 2.
In Second Stop Solder 220-Ohm Resistor To The Collector Pin Of The Transistor As Shown In The Picture.
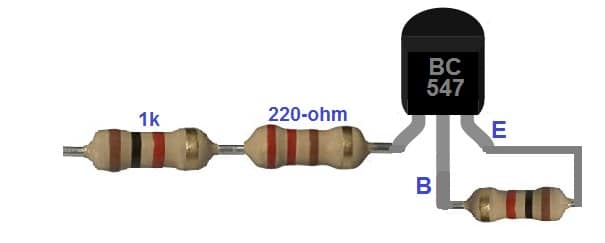
Step 3.
In This Step Connect 1 Kilo-Ohm Resistor With The Second Point Of The 220-Ohm Resistor.

Step 4.
In Step 4 Connect Diode IN4007 With The Base Point Of Transistor As We Have Connected In The Picture Given Below. Connect The Cathode Point Of Diode With The Base Point Of The Transistor.

Step 5.
Connect – Point Of Green Led With Diode – Point And +Ve Point Of LED Green Led With 1k Resistor As Shown Below.

Step 6.
Solder – Point Of Red LED To -Ve Point Of The Diode And + Point Of Red LED With Collector Point Of The Transistor As We Have Shown In The Diagram Given Below.
When You Will Connect 3 V Battery Then Red LED Will Glow Completely If The Battery Will Be Low. Green Led Glows When The Battery Will Be Charged Above 3.2V.
Its Tested Circuit Its Complete
Related Posts

Christmas LED Lights Circuit
